Moving Around

The display is divided into five main areas:
- Code listing. Disassembled code and data is shown here.
- References. Shows a list of the places in the file that reference the currently selected line.
- Notes. A list of notes in the project. Useful as bookmarks.
- Symbols. All known symbols. The buttons at the top allow you to filter out symbol types that you're not interested in.
- Info. Information about the selected line. For code, this will include a summary of the instruction's behavior.
The center code list window is divided into rows, one per line of disassembled code or data. This is a standard "list view" control, so you can select a row by left-clicking anywhere in it. Use Ctrl+click to toggle the selection on individual lines, and Shift+click to select a range of lines. You can move the selection around with the up/down arrow keys and PgUp/PgDn. Scroll the window with the mouse wheel, or by dragging the scroll bar thumb.
Each row is divided into nine columns. You can adjust the column widths by clicking and dragging the column dividers in the header.
The columns on the right side of the window are similar to what you'd find in assembly source code: label, opcode, operand, comment. The columns on the left are what you'd find in a disassembly (file offset, address, raw bytes), plus some information about processor status flags and line attributes that may or may not be useful to you. If you find any of these distracting, collapse the column. (Many of the screen shots captured here will omit the "Attr" column for the sake of compactness.)
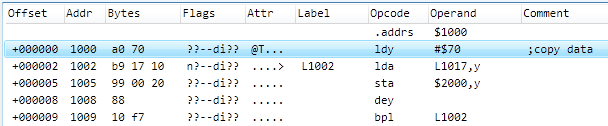
Click on the fourth line down, which has address 1002. The line has a label, "L1002", and is performing an indexed load from L1017. Both of these labels were automatically generated, and are named for the address at which they appear. When you clicked on the line, a few things happened:
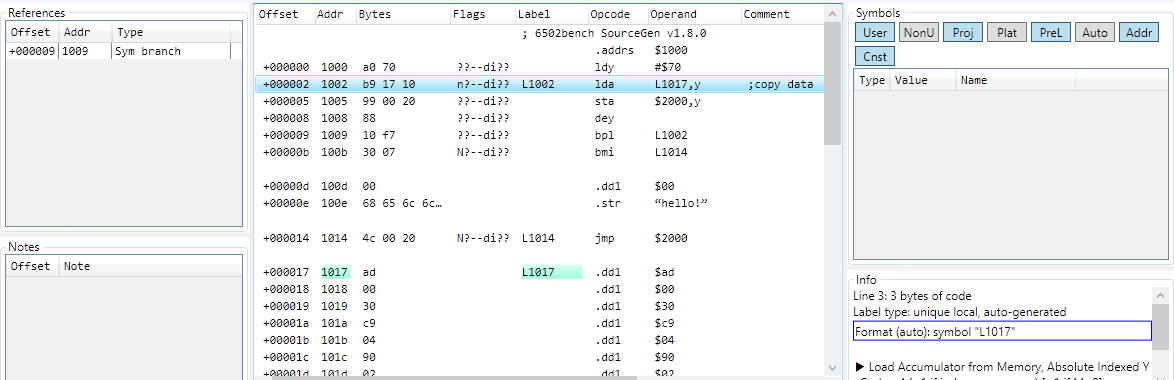
- The line was highlighted in the system selection color (usually blue).
- Address 1017 and label L1017 were highlighted. When you select a line with an operand that targets an in-file address, the target address is highlighted.
- An entry appeared in the References window. This tells you that the only reference to L1002 is a branch from address $1009. The branch operand on line $1009 was also highlighted.
- The Info window filled with a bunch of text that describes the line format and some details about the LDA instruction.
Click some other lines, such as address $100B and $1014. Note how the highlights and contents of other windows change.
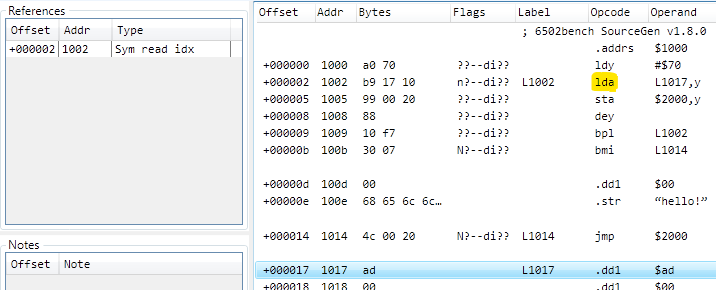
Click on L1002 again, then double-click on the opcode ("LDA"). The selection jumps to L1017. When an operand references an in-file address, double-clicking on the opcode will take you to it. (Double-clicking on the operand itself opens a format editor; more on that later.) You can accomplish the same thing by selecting the line and hitting Ctrl+J, or using Jump to Operand from the Navigate menu.
With line L1017 selected, double-click on the line that appears in the References window. Note the selection jumps to L1002. You can immediately jump to any reference.
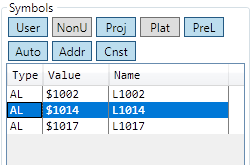
At the top of the Symbols window on the right side of the screen is a row of buttons. Make sure "Auto" and "Addr" are selected. You should see three labels in the window (L1002, L1014, L1017). Double-click on "L1014" in the Symbols list. The selection jumps to the appropriate line.
Select Navigate > Find. Type "hello", and hit Enter. The selection will move to address $100E, which is a string that says "hello!". You can use Navigate > Find Next to try to find the next occurrence (there isn't one). You can search for any text that appears in the rightmost columns (label, opcode, operand, comment).
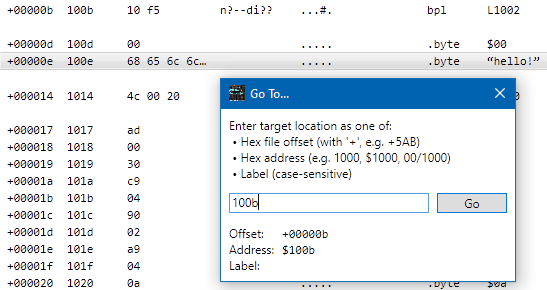
Select Navigate > Go To. You can enter a label, address, or file offset. Enter "100b" to set the selection to the line at address $100B.
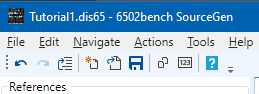
Near the top-left of the SourceGen window is a set of toolbar icons. Click the curly left-pointing arrow, and watch the selection move. Click it again. Then click the curly right-arrow a couple of times. Whenever you jump around in the file by using the Go To feature, or by double-clicking on opcodes or lines in the side windows, the locations are added to a navigation history. The arrows let you move forward and backward through it.
The "Nav Backward" feature is usually bound to the 4th button found on some mice (generally found on the side, activated with the thumb). This can be used to navigate quickly through a project using only the mouse.