Using SourceGen
Many disassemblers take a very simple approach: they dump the entire binary as if it were an instruction stream. It's then left to the human to carve away the data sections. SourceGen comes at the problem from a different angle, and assumes everything is data until proven otherwise. The human need only identify where code areas start. The computer will trace through code automatically, following branches and subroutine calls, and whatever isn't traced is either data storage or junk (dead code, alignment padding, etc).
The difference in approach can be confusing at first for people accustomed to other software. Code tracing tends to produce better results more quickly, however, because much of the tedium is handled by the software.
This first section covers the basics of working with SourceGen: how to move around, make edits, generate code, and so on. You can't do anything useful until you open an existing project or create a new one, so we'll start there.
A SourceGen project is always associated with a data file, which
holds part or all of the program being disassembled.
For simplicity, the project is given the same name as the data file, with
.dis65 on the end.
No part of the data file is included in the project file, so you need
to keep both files in the same place.
If the program you're disassembling was split into more than one data
file, you'll need a separate project file for each (or combine them into
a single file with the concatenation tool).
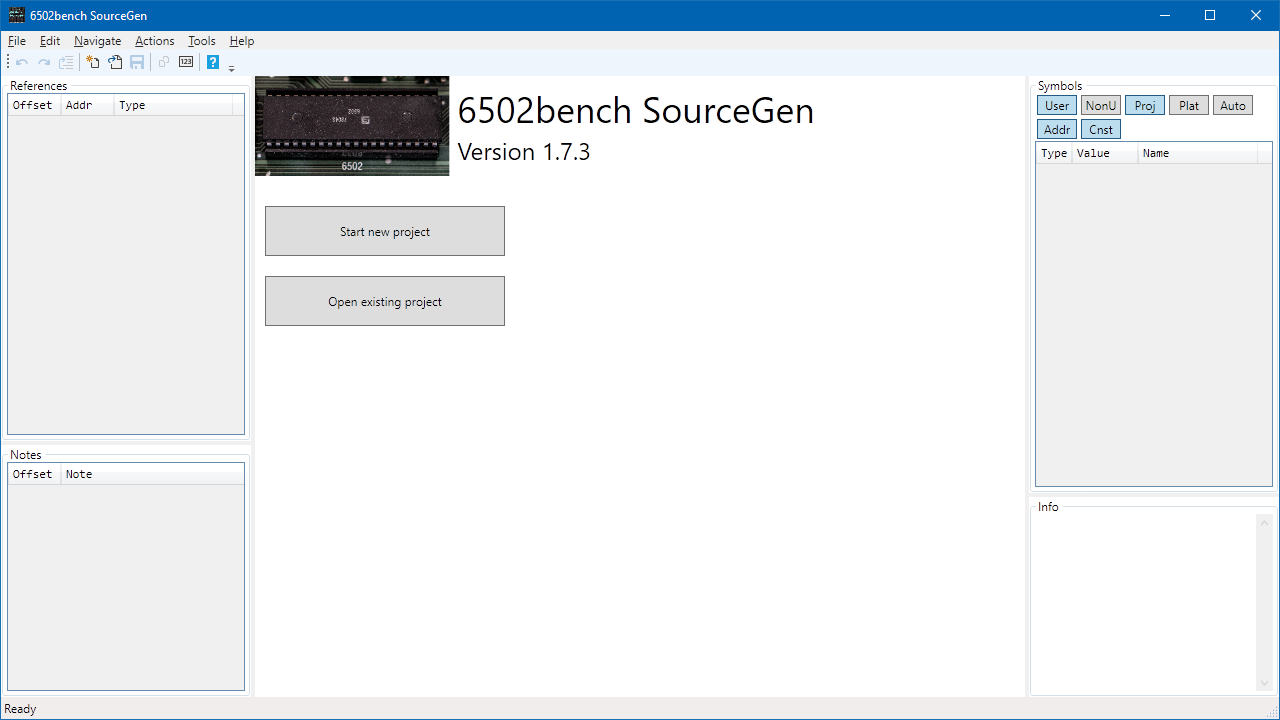
To start a new project, launch SourceGen, and click on the "Start New Project" button on the initial screen, or use File > New. This opens the "New Project" window, which lets you specify the target system and data file.
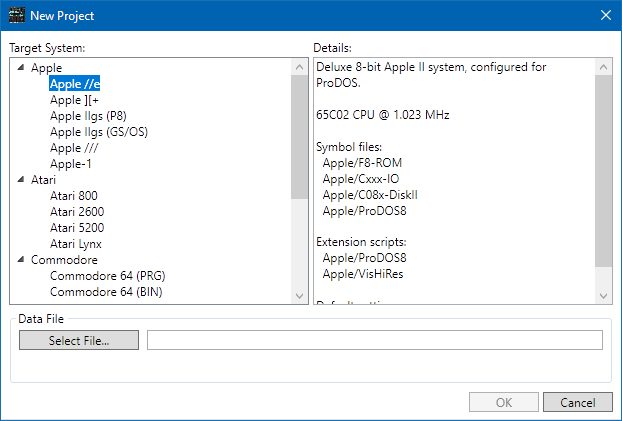
Choosing a target system, such as Apple //e or Commodore 64, will create a project configured with the appropriate CPU and options. If nothing in the list matches the file you want to work on, there are "generic" entries for each of the primary CPU varieties (6502, 65C02, W65C02, and 65816). If you're unsure, just take your best guess. It's easy to change things after the project has been started.
The area on the right side of the window has a list of the symbol files, scripts, and optional features that will be enabled for the selected system. The various items here will be explained in more detail later on.
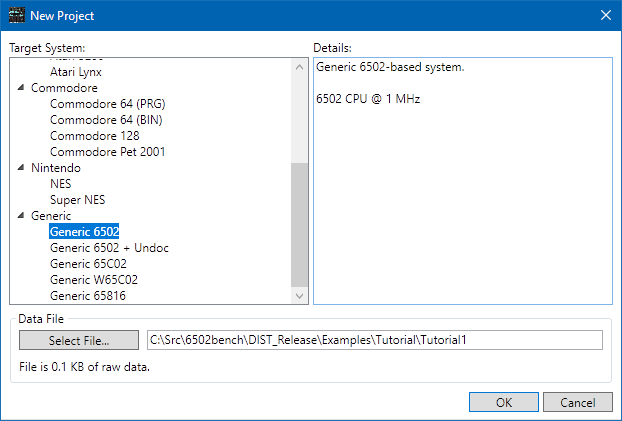
For this tutorial, we're going to use "Generic 6502", near the bottom of the list.
The other thing we need to do here is select the data file to be disassembled. Click Select File, navigate to the Examples directory in the SourceGen installation directory, open Tutorial, and select Tutorial1.
Click OK to create the project.
You will be asked to save the project file. Some features create or load files from the directory where the project file lives, so we want to establish where that is. It also enables the optional auto-save feature. Save it with the default name (Tutorial1.dis65), in the directory where the tutorial data file lives.
(It's okay to create the project in the installation directory. You don't need to work off of a copy of the data file; SourceGen doesn't modify it, so you don't have to worry about trashing the example data.)
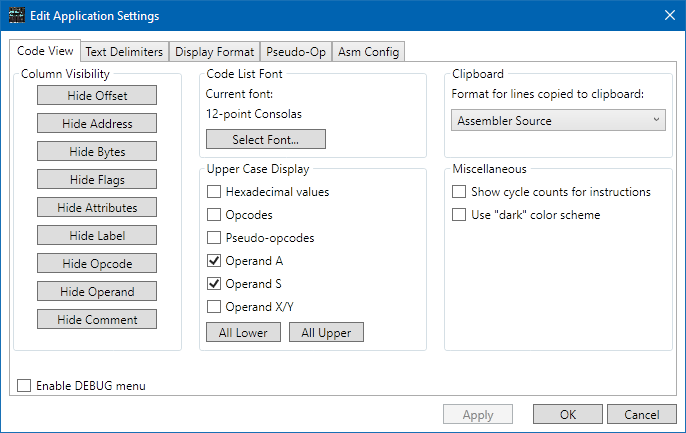
The disassembly display can be tailored to your personal preferences. Use Edit > Settings to open the settings editor. You can change fonts, upper/lower case, text delimiters, line wrapping, pseudo-op names, and more. There are "quick set" buttons on some screens that allow you to make the output resemble various popular assemblers.
All app settings are local to your system, and do not affect the project in any way. If somebody else opens the same project, they may see entirely different pseudo-ops and upper-case choices, based on their own personal preferences. (The settings that affect projects are accessed through a different screen, via Edit > Project Properties.)
For now, click Cancel to leave everything set to default values.